
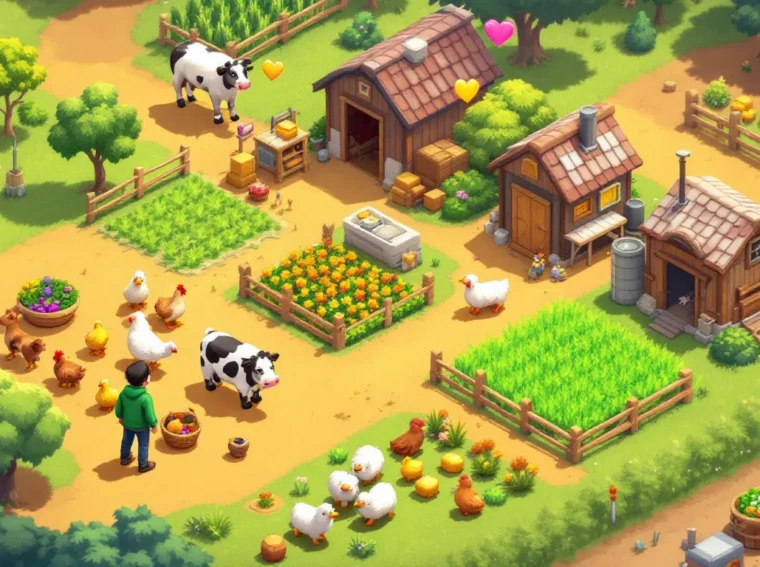
Stardew Valley’s farming mechanics go way beyond planting crops and waiting for the harvest. The heart of any thriving farm is the animals you raise, whether it’s chickens laying eggs, cows producing milk, or the beloved pets that become part of your daily routine. Managing Stardew Valley animals effectively can transform your farm from a struggling operation into a profitable enterprise, but newcomers often stumble through trial and error. This guide covers everything you need to know about Stardew Valley pets, livestock, and the mechanics that make animal care feel rewarding rather than like a chore. From your first dog or cat to breeding your own herd, we’ll walk you through the systems that separate casual farmers from seasoned players who’ve optimized every aspect of their animal operations.
Key Takeaways
- Managing Stardew Valley animals effectively requires building infrastructure early—construct a silo before your first barn to avoid hemorrhaging gold on hay from Marnie at ¥50 per animal daily.
- Stardew Valley animals divide into farm animals (income generators like chickens, cows, and sheep) and pets (emotional companions that don’t produce sellable items but boost farm satisfaction).
- Processing animal products dramatically multiplies profit—raw eggs become mayonnaise worth 9x more, and milk becomes cheese worth 4-5x the raw material value, making processing essential for late-game wealth.
- Petting animals daily increases their friendship, raising product quality by up to 2x the value; a single cow with max friendship produces ¥16,000 more over its lifespan than an unpetted cow.
- Successful breeding requires an empty crib slot, animals at 800+ friendship, and consistent food supply; many players fail expansion by overloading buildings to capacity, blocking breeding triggers entirely.
- Plan your animal operation around seasonal bottlenecks—store 50+ hay per animal before winter, dedicate fall to maximizing pig truffle production (¥625 each), and accept that sheep produce wool only when in season.
Understanding Animal Types and Their Purpose
Not all Stardew Valley animals serve the same function. The game divides them into farm animals (income generators) and pets (companions that boost your happiness). Understanding this distinction helps you plan your farm layout and budget effectively.
Farm Animals vs. Pets: Key Differences
Farm animals include chickens, ducks, cows, goats, sheep, and pigs, each producing valuable items you can sell or process. Pets like dogs and cats don’t generate income directly, but they offer emotional rewards and contribute to your overall farm satisfaction.
Chickens are your entry point. They’re cheap (¥800 each), require minimal space in a coop, and produce eggs daily, white eggs normally, or brown eggs if you have a brown chicken variant. Ducks are a tier up: they cost ¥1,200, lay eggs every other day, and their eggs are worth more (¥110 versus ¥50 for white eggs, before quality adjustments). Cows and goats live in barns and produce milk on a similar schedule, with goats being slightly cheaper (¥1,000 versus ¥1,500 for cows) but yielding less profit per item.
Pets work differently. When you first arrive in Pelican Town, you can choose either a dog or cat as your starting pet. Unlike farm animals, your pet doesn’t produce anything sellable. Instead, petting your dog or cat daily raises their friendship meter, which affects their animation and how they interact with you. Some players bond emotionally with their pets: others see them as lower priority. That’s the flexibility Stardew Valley gives you, pets are optional in economic terms but deeply satisfying if you care about the relationship mechanic.
Sheep and pigs round out the farm animal roster. Sheep produce wool (shearable once per day after reaching adulthood), while pigs root for truffles on sunny days, a mechanic unique to pigs that can net you serious cash if you’re dedicated to foraging optimization.
Which Animals Provide Income
If your goal is profit, focus on animals with consistent daily or frequent output. Chickens and ducks are your reliable workhorses. A single chicken with high friendship produces a large egg worth ¥280 (versus ¥50 for a regular egg), scaling further if you process it into mayonnaise (¥450 for regular quality). That’s a 9x return on a ¥50 egg through processing.
Cows and goats follow similar economics. A cow in a barn produces milk daily once it reaches adulthood. Large milk (¥240 normally) becomes cheese (¥900 if aged in a cask), another major profit multiplier. Goat milk is slightly less valuable but follows the same processing advantage.
Ducks are underrated for profit. While they lay eggs every other day rather than daily, duck eggs are inherently worth more and process into higher-quality mayonnaise. If you’re optimizing for raw gold per animal, ducks often outpace chickens once you factor in selling price and processing margins.
Sheep provide wool, which processes into cloth and sells for ¥600 (versus ¥75 for raw wool). It’s a respectable income stream if you have space, but wool output is tied to shearing frequency, once per day when the sheep’s wool is ready. Pigs offer the highest potential ceiling if you maximize truffle hunting (truffles sell for ¥625 each), but this requires dedication and good luck with RNG on which tiles they choose to dig.
Your pets don’t contribute to income, but they do improve your farm rating, which is worth mentioning if you care about the community center bundles or just want a fully upgraded homestead.
Getting Started: Purchasing and Housing Your First Animals
Before you buy a single animal, you need infrastructure. A coop for chickens and ducks, a barn for cows and goats, each requires space, wood, and stone. Running out of either before you’ve built your first structure is a genuine early-game trap.
Initial Cost and Budget Planning
Your first coop costs ¥4,000 to build and requires 388 wood and 60 stone. That’s substantial for day one. Most players don’t have that capital until they’ve sold at least one harvest’s worth of crops. A basic strategy: focus on crops your first spring, save your gold, and build the coop by summer when you can start raising poultry.
Once the coop is built, chickens cost ¥800 each at Marnie’s ranch. Buy at least two, one provides eggs, the second ensures you can breed and expand. Ducks cost ¥1,200, same principle. Your first barn costs ¥10,000 and requires 450 wood and 100 stone. That’s a mid-game investment, not early-game.
Here’s a realistic early-game budget timeline:
- Days 1-28 (Spring): Farm crops, save gold. Aim for ¥5,000+ by end of month.
- Days 29-35: Build coop (¥4,000). Buy 2-3 chickens (¥2,400 total).
- Summer: Expand chickens if profitable. Plan for barn by summer’s end.
- Fall: Build barn, buy cows. Fall is when animal operations become truly profitable.
Don’t rush barn construction. Cows are only worth it once you have ¥1,500+ in daily income from other sources, otherwise you’re starving yourself of operating capital. Players who skip animals entirely their first year and focus on crop profitability often have a smoother mid-game transition.
Building and Upgrading Barns and Coops
Coop and barn placement matters more than you’d think. If your coop is far from your farm entrance, daily animal care becomes tedious. Place coops near your cabin for convenience. Barn placement is less critical since you’ll be there less frequently (cows are slower to care for than chickens), but proximity to your main path still saves time.
Both buildings can be upgraded. A coop upgrade (¥1,000 + 150 wood) adds an incubator and allows you to raise ducks alongside chickens. A barn upgrade (¥1,000 + 150 wood) adds a crib for breeding animals. Without the barn upgrade, you can’t breed cows or goats, a critical limitation if expansion is your goal.
A second silo deserves mention here. Your animals need hay year-round. Silos store cut grass as hay (one silo holds enough hay for roughly 14 cows for a full season). Many players build a silo before their first barn, then regret it. Actually, that’s smart planning. Hay is cheaper than buying from Marnie (¥50 per day for a cow’s food) and saves you weeks of grain farming. A silo costs ¥1,000 + 100 wood + 20 stone, and the gold savings pay for itself within a month once you have animals eating from it.
Upgrades feel grindy if you’re obsessing over them, but they follow a predictable schedule. First coop → buy chickens → first barn → buy cows → barn upgrade for breeding → additional coops for ducks or more chickens. Don’t deviate from this flow unless you have a specific reason (like wanting a pigs-only farm, which requires the barn and some planning).
Caring for Your Animals: Daily, Seasonal, and Long-Term Needs
Animal care is a daily loop, but the specifics change by season and animal type. Neglect this loop and your animals get sick. Keep it up, and they’ll reward you with consistent, high-quality output.
Feeding and Watering Your Livestock
Every animal needs food and water daily (with rare exceptions). Chickens, ducks, cows, goats, sheep, and pigs all operate on the same hunger timer, if you don’t feed them by nightfall, they go hungry and lose friendship points. Hungry animals also stop producing items, so neglect compounds quickly.
Indoors (in coops and barns during winter), animals eat hay exclusively. Outdoors (spring through fall), animals graze on grass if it’s available. If you have no grass and no hay, you must buy food from Marnie at ¥50 per animal per day. That’s ¥1,500 per month for 10 animals, a devastating drain if you’re not prepared.
Water is simpler than food. Place a silo near your barn and coop, and it auto-waters any animals in buildings with silos attached. If you don’t have a silo, you must manually water using a watering can, which is tedious and feels like punishment. Seriously, get a silo.
Grass management is its own mini-game. In spring and summer, grass spreads naturally if you don’t cut it all down. Many players deliberately leave grass patches so animals can graze outdoors, reducing hay consumption. Others cut everything and use silo hay exclusively, treating grass as a dead resource. The optimal approach depends on your layout and how much you care about efficiency. For casual players, letting grass grow wild works fine. For optimization, cutting strategically and managing hay reserves requires planning but saves you real money.
One critical detail: animals that go hungry for multiple days get sick. A sick animal won’t produce items and needs a ¥500 vet visit (or you can wait for them to recover, which takes days). Sickness is entirely preventable with basic care, so don’t stress about it, just don’t forget your hay supplies before winter.
Petting and Friendship Mechanics
Each farm animal and pet has a friendship meter (0-1000 points). Higher friendship improves the quality of their products. A cow with 0 friendship produces small milk: at max friendship (1000 points), it produces large milk. The difference is ¥80 per item, seemingly small until you realize a 200-day lifespan means ¥16,000 in total difference per cow.
Petting increases friendship by 10 points per pet. You can pet each animal once per day. Since reaching max friendship requires 100 days of consistent petting (1000 ÷ 10 = 100), plan ahead. Many players don’t pet animals daily, it’s not required, but if you want consistently high-quality products, it’s worth the 10-15 minutes of daily effort.
Stardew Valley pets (dogs and cats) also have friendship meters, but they cap at 1000 and don’t affect any mechanical output, they affect only your interaction animations and whether your pet wags its tail or looks sad. Pets are entirely about attachment, not profit.
There’s a seasonal consideration: animals lose 20 friendship points when exposed to rain or snow without a heater in their building. This doesn’t happen if animals are indoors (coops and barns count). Winter exposure is the main risk. If you leave animals outside on a winter day, expect friendship to drop and animals to be unhappy. Not catastrophic, but easily avoided.
Many players overlook this: animals also react to being separated from their friends. If you sell a cow that’s bonded with other cows, the remaining cows lose some friendship. This is flavor, not mechanical, but it matters if you care about the narrative coherence of your farm.
Handling Animal Health and Illness
Sickness is rare, but it happens. An animal gets sick if it goes hungry for 2+ days or is exposed to harsh weather without proper shelter. A sick animal shows a purple sulfur icon above its sprite.
You have two options: visit the vet (¥500, same-day cure) or wait 2-3 days for natural recovery. The vet is worth it, those days without production are worth more than ¥500 on any profitable farm. Plus, you’ll sleep better knowing your animals aren’t suffering.
Prevention is trivial: keep silos stocked before winter, buy hay reserves in fall, and ensure all animals are in heated buildings (coops and barns have built-in warmth: outdoor pens don’t). One winter without illness is 100% preventable with basic planning.
A quirk worth mentioning: if an animal dies (from extreme neglect over weeks), it’s gone forever. This shouldn’t happen if you’re playing intentionally, but it’s the harsh consequence for completely abandoning your farm. Most players never hit this threshold.
Animal pregnancy is distinct from illness. Pregnant animals (indicated by a heart icon) will give birth if there’s a free crib in the barn. This is normal and good, you want breeding. An animal with a heart icon is healthy: don’t confuse it with sickness.
Maximizing Profit: Animal Products and Quality Management
Animal products are the foundation of farm income in mid-to-late game. Raw eggs and milk sell for pocket change: processed items are where the real margins are. Understanding the processing pipeline is the difference between a ¥10,000/day farm and a ¥50,000/day farm.
Egg and Milk Production Mechanics
Chickens produce one egg daily once they mature (3 days after purchase). White eggs (standard chicken) sell for ¥50 raw: large white eggs (high-quality or high friendship) sell for ¥100. Process a white egg into mayonnaise, and it’s worth ¥450. That’s a 9x multiplier on your raw material.
Duck eggs are inherently better. Regular duck eggs sell for ¥110, large duck eggs for ¥220. Processed into mayonnaise, they’re worth ¥600. If you care about profit per animal, ducks outpace chickens due to this higher baseline value, even though they produce every other day rather than daily.
Cows produce milk daily. Large milk (from high-quality cows) sells for ¥480 raw. Cheese it (requires a cheese maker in the barn), and it’s worth ¥900 unstaged, ¥1,000+ if aged in a cask. You can also make butter from milk (requires a butter churn), which is worth ¥450, less than cheese but still a solid 4-5x multiplier on raw milk cost (¥0 if produced by your own cows).
Goat milk is worth ¥100 raw, ¥200 if large quality. Cheese from goat milk sells for ¥400 unstaged, ¥450+ if aged. Goats are less profitable than cows per animal, but they’re cheaper (¥1,000 versus ¥1,500 for a cow) and smaller, meaning you can fit more in a barn. Some players prefer 10 goats over 6 cows for space efficiency.
Sheep wool is worth ¥75 raw, ¥600 processed into cloth. This is the highest multiplier in the game, 8x your raw material value. But sheep only produce once per day when ready (not every day like chickens), so ceiling output is lower. Wool production also pauses in winter, making sheep seasonal compared to other animals.
Processing Items for Higher Value
Three core machines unlock processing: the mayonnaise machine (¥1,000, available at the blacksmith once you’ve unlocked it), the cheese maker (¥1,000), and the butter churn (¥2,000). You craft these yourself or buy from the blacksmith.
Mayonnaise machines require no crafting ingredients, drop eggs in, get mayonnaise out. But they take 3 in-game hours to process, and you need one machine per 1-2 animals if you want to process everything daily. Many players have 3-4 mayonnaise machines running simultaneously.
Cheese makers and butter churns also take 3 hours per batch. Casking (aging items in casks for quality improvement) requires multiple casks placed in a basement and takes 14+ days per item. These create an interesting rhythm: you produce milk daily, but the cheese/butter pipeline is slower, so you batch-process rather than handle each item individually.
Pig truffles deserve special mention. Truffles don’t require a machine, they’re foraged items your pig digs up on sunny days (¥625 each, sometimes more if you have luck-boosting items equipped). A pig with decent foraging luck can dig 2-3 truffles per day in fall. You can also process truffles into oil using an oil maker, which is worth significantly more. Truffle oil is a high-end item, if you’re going full truffle farming mode, it’s a viable endgame strategy.
Seasonal Changes and Production Cycles
Winter is rough for animals. Most produce indoors with hay, which is the same across seasons, but grass foraging stops, meaning animals graze less and you rely entirely on hay reserves. If you haven’t stored enough hay by November, you’re buying from Marnie at ¥50/animal/day, which erases margins instantly.
Spring is recovery. Grass grows, animals graze freely, hay consumption drops, and you rebuild reserves for the next winter. Early spring is when new players decide whether they’ve planned adequately or are about to starve themselves.
Summer is peak production. Grass is abundant, animals are healthy, and daylight hours are long enough that daily care doesn’t feel rushed. This is when profits feel real.
Fall is final push before winter. You should be stocking hay, increasing animal count if you’ve planned ahead, and processing fall goods (pigs produce truffles exclusively in fall). A well-managed farm has ¥100,000+ stored by the last day of fall.
One nuance: quality of products doesn’t change seasonally, only based on animal friendship. A max-friendship cow in winter produces large milk just as much as in summer. Where seasonality bites is production frequency, sheep don’t produce wool in winter, and pigs only produce truffles in fall. These hard seasonal gates force players to plan around them or lose income.
Breeding and Expanding Your Herd
Breeding is your ticket from 5 animals to 50. It’s also where many players get confused, thinking they need multiple animals of the same gender (they don’t) or that breeding is random (it’s not, it’s predictable).
How to Breed Animals Successfully
Any two animals of the same species can breed regardless of gender. A chicken can breed with another chicken, a cow with another cow. That’s all. You need a crib in the barn or coop (unlocked after the first barn/coop upgrade) and space for the baby.
Once you have a crib and space, animals with friendship above 800 points and a full belly have a 50% chance to breed each day during spring, summer, and fall (not winter). You don’t manually trigger anything, it happens in the background. If conditions are met and RNG is favorable, the next morning you’ll have a baby.
Babies take 3 days to mature (chickens) or 7 days (cows, goats, sheep, pigs). Once mature, they behave like adults, producing items daily if you maintain them. The newborn rate isn’t guaranteed, so if you want to expand fast, keep multiple animals at 800+ friendship, which requires petting 80+ animals daily. Most players don’t, so growth is steady but slow.
One critical rule: if there’s no space in a barn or coop (no empty slot for a new animal), breeding won’t trigger even if friendship and food conditions are met. This is how you accidentally stop expansion, you think breeding failed when actually you’re just full. Count your animal slots carefully.
Animals have a lifespan (infinite in the original game, but you age into adulthood and then stay the same age forever). You won’t accidentally lose animals to old age, so breeding strategically means you can build a herd indefinitely without replacement.
Managing Population and Space
Each coop can hold up to 12 animals (chickens, ducks, etc.). Each barn can hold up to 12 animals (cows, goats, sheep, pigs). Multiple buildings stack these limits, so 2 coops = 24-animal capacity for poultry. Space is your hard constraint, not the breeding system.
A rough endgame farm layout:
- Coops: 3-4 coops (36-48 chickens/ducks)
- Barns: 2-3 barns (24-36 cows/goats/sheep)
- Pets: 1 dog and 1 cat (capacity)
This requires ¥40,000+ in building costs and roughly 1,000+ wood. It’s a long-game investment, not something you achieve in year 1.
Space management also means deciding what to cull. If you have 12 chickens and 2 want to breed, you must sell or move an animal to the crib, forcing you to choose. Many players keep a “breeding male” and multiple “production females” to control population growth. This is personal preference, there’s no mechanical gender distinction beyond flavor.
One optimization: deluxe buildings exist (coops and barns with heaters included). These cost more upfront but save you from manually managing winter heating. If you’re planning to expand past 3-4 buildings, deluxe versions save both effort and resources in the long run.
Special Animals and Unique Mechanics
Beyond standard farm animals and basic pets, Stardew Valley has special animals with unique mechanics. Horses are useful but optional, and pets have depth worth exploring.
Horses, Pets, and Other Companions
Your starting pet (dog or cat) is a Stardew Valley pet that follows you around town. It doesn’t generate income, but petting it daily increases friendship, and it becomes a comforting presence on your farm. Many players bond with their starting pet emotionally: others ignore it entirely. Both are valid playstyles.
You can add a second pet by purchasing one from Marnie (¥1,000 for a cat if you started with a dog, vice versa). Two pets means double the petting opportunities and a fully pet farm, though again, this is flavor, not mechanical advantage.
Horses are acquired by purchasing one from the stable (¥1,000). Horses let you ride fast, but they require a stable on your farm (built through the carpenter, ¥10,000 + resources). Unlike farm animals, horses don’t produce items or require feeding. They’re a convenience feature, you ride them around town to move faster, then board them at the stable or at town locations. Horses save time on large farms or if you dislike the walking animation.
Junimos are sometimes discussed as “pseudo-animals,” but they’re automation bundles, not animals. They don’t fit in this guide’s scope, but they’re worth knowing exist if you’re building an end-game farm.
Wildlife (raccoons, squirrels) occasionally appear on your farm but aren’t animals you can own or raise. They’re ambient flavor that some players find charming.
Desert Trader and Special Animal Variants
The desert trader is an NPC who exchanges items for other items, not animals, but relevant for animal players because they trade ingredients useful in processing. This is tangential to animal care, but worth knowing if you’re optimizing.
Special variants exist within animal types. Brown chickens, blue chickens, and white chickens are cosmetic variants with no mechanical difference (they lay the same eggs at the same rate). Void chickens lay void eggs (black eggs worth ¥65 raw, ¥400 if processed into void mayonnaise). Void eggs are rare, you must obtain them from a void egg pendant or the desert trader, but they’re viable if you want a specialty farm focused on void goods.
Void chickens themselves don’t breed with regular chickens: they breed within their own species. So a void chicken farm is a deliberate choice, not a side project. Some players dedicate a coop to void chickens for the novelty and unique mayonnaise color.
Cow and goat variants (like the golden-colored animals or rare drops from events) exist but operate identically to base variants. Cosmetics matter if you want your farm to look distinctive: mechanically, they’re irrelevant.
The most important special mechanic is the blue grass (a forage item), which some players specifically farm alongside animals because it’s a high-value wild item. But this is optimizing forage, not animal management, a topic for a separate guide.
One special note for pet enthusiasts: Stardew Valley dogs and cats in particular benefit from a stardew valley mermaid show if you’re exploring all the game’s content and want your pets to experience different locations on your farm. Your pets can tag along to festivals, events, and even the mermaid show if the circumstances align, though this is pure roleplay, not mechanical. If you’re curious about every Easter egg, exploring does the mermaid show content is worthwhile for completionists.
Common Mistakes and Pro Tips
Experienced Stardew Valley players optimize around pitfalls that trip up newcomers. Learn these mistakes, and you’ll skip months of inefficient grinding.
Avoiding Animal Care Pitfalls
Mistake 1: Buying too many animals before securing hay. New players see profit potential, buy 10 cows, then realize they have 500 hay and need 1,000 per season. Then they hemorrhage money buying from Marnie. Solution: calculate hay needs before buying animals. A rough guideline is 50+ hay per animal per season (accounting for some outdoor grazing and waste). If you don’t have it stored, don’t expand.
Mistake 2: Placing coops far from your home. Animal care is a daily loop. If your coops are at the far edge of your farm, you’re wasting 5+ minutes walking every morning. Solution: cluster buildings near your cabin. It sounds silly, but players spend 10+ hours per playthrough doing animal care, efficiency compounds.
Mistake 3: Neglecting silo storage. This is self-inflicted damage. A silo costs ¥1,000 and holds enough grass to sustain a small herd for seasons. Without it, you’re buying hay daily. Solution: build a silo before your first barn. Seriously.
Mistake 4: Forgetting to pet animals. You don’t have to pet animals, they’ll produce at base quality either way. But high-friendship animals produce large/high-quality items worth 2x more. If you pet 10 animals daily (10 minutes), you’re adding ¥500-1,000 to your daily income over months. Solution: make petting part of your routine or accept lower margins.
Mistake 5: Buying animals without space. You can’t breed if you’re full, so a coop at capacity won’t expand. Solution: always have one empty slot per building if you want breeding, or don’t breed and accept your animal count as fixed.
Advanced Strategies for Maximum Returns
Strategy 1: Deluxe buildings for heat efficiency. Standard barns need heaters placed inside (using coal and bars). Deluxe barns have heat built-in, saving resources and effort. For a 3+ barn operation, deluxe versions pay for themselves in saved winter heating costs.
Strategy 2: Batch processing with multiple machines. One cheese maker produces one cheese every 3 hours. If you have 12 cows producing milk daily, you need 4 cheese makers to process daily production (12 milk → 4 batches of 3 items → 4 cheese makers). Underestimate this and you’re sitting on unprocessed milk, losing value daily. Solution: build 1 processing machine per 3 animals, adjusting for production rates (eggs faster, milk slower).
Strategy 3: Season-specific farms. Pigs only produce truffles in fall. If you dedicate a barn to pigs, you’re getting ¥0 in winter, spring, and summer. This is fine if you plan for it (fattening coffers spring-fall, spending in winter), but it requires discipline. Most players build mixed barns (cows for year-round income, pigs for fall surplus) instead.
Strategy 4: Breeding females only. If you have 12 slots in a coop and want 10 hens + 2 breeding pairs, you’re over capacity. Solution: breed to your max capacity, then focus on production females (no breeding). This requires accepting slower breeding cycles but maximizes production animals at any given time.
Strategy 5: Truffle optimization. Pigs root for truffles on sunny days in fall. One pig produces 1-2 truffles per day (sometimes 0 on unlucky days, rarely 3). If you’re maximizing truffles, you want 5+ pigs in fall and accept the ¥0 winter output. Truffles process into truffle oil (¥4,500 per oil if aged), creating an asymptotic wealth curve if you commit.
Many players reference tier lists and build guides from Game8 or GameRant for animal-focused strategies. These external sources offer meta analysis and tier rankings for animal profitability if you want a competitive approach rather than planning organically.
One often-overlooked strategy: animal happiness affects not just quality but friendship decay rates. Unhappy animals (those neglected) lose friendship faster, compounding losses. Conversely, very happy animals maintain friendship even if you miss a day of petting. The exact mechanics are complex, but the takeaway is: consistency beats sporadic effort.
The meta is slowly shifting as players find new exploits and the community tests edge cases. What’s optimal in 1.6 may differ from the older 1.5 meta. Monitor patch notes if you’re serious about optimization, as updates occasionally nerf broken mechanics or introduce new animals with different economics.
Conclusion
Stardew Valley animals transform from a side activity into your farm’s economic engine once you understand their mechanics. Whether you’re raising a Stardew Valley dog as your sole companion, building a Stardew Valley dog and cat pair for emotional connection, or optimizing a herd of 40+ animals for maximum profit, the fundamentals remain consistent: feed, water, pet, and process.
The key insight separating new players from experienced ones isn’t secret knowledge, it’s consistency. Building silos before winter, petting animals for quality, processing items for margins, and planning breeding cycles around space constraints. These aren’t hidden systems: they’re just easy to overlook when you’re overwhelmed.
Start small. Buy 2-3 chickens in your first summer, automate with a silo and mayonnaise machine, and let that engine run while you explore the rest of the game. Expand deliberately when you’ve proven your infrastructure can handle it. In a year or two of in-game time, you’ll have the foundation for a profitable animal operation that pays for itself and generates surplus for the rest of your farm ambitions.
Your animals are pets, livestock, and money makers, sometimes all three. Treat them with that respect, and they’ll reward you generously. The truth behind Stardew Valley is that the truth behind the Stardew valley lies in these small, consistent systems that compound over time. Plan, execute, and watch your farm become the thriving homestead you envisioned when you first stepped off that bus.