
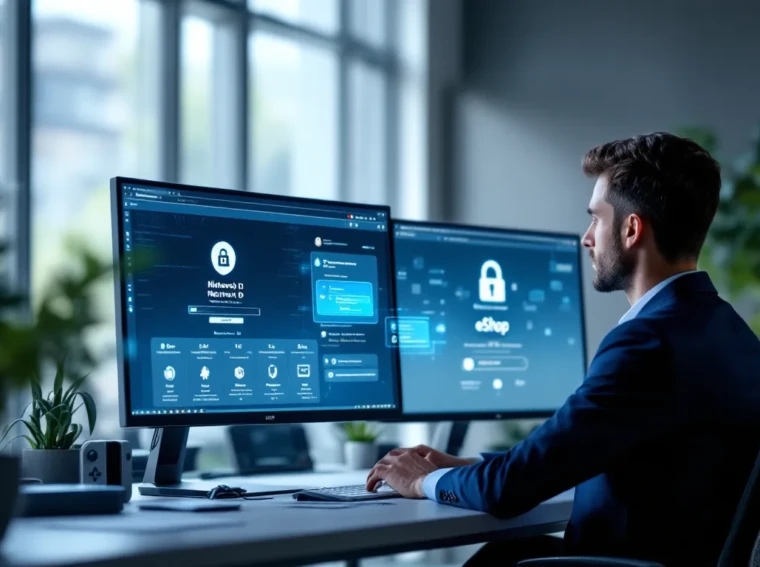
A Nintendo Network ID (NNID) was once essential for anyone playing on Wii U or 3DS, but if you’re still managing these consoles or discovering older Nintendo hardware, understanding how to create, maintain, and troubleshoot your NNID matters. While Nintendo has transitioned newer systems to the unified Nintendo Account, legacy NNID accounts still unlock online multiplayer, eShop access, and digital purchases on older platforms. This guide walks through everything you need to know about Nintendo Network ID setup, account management, and how to handle the shift toward Nintendo’s current authentication system, whether you’re returning to retro Nintendo gaming or managing multiple devices across your collection.
Key Takeaways
- A Nintendo Network ID (NNID) is the essential legacy authentication system for Wii U and 3DS online gaming, eShop access, and digital purchases—still functional and valid even as Nintendo shifted to unified Nintendo Account for Switch.
- Creating an NNID takes 10–15 minutes and requires an internet connection, valid email, and device-specific setup on your Wii U or 3DS console through System Settings.
- You can link your NNID to a Nintendo Account for cross-platform identity management, though linking is optional and doesn’t automatically migrate games or eShop credit between platforms.
- One NNID can be used across multiple Wii U and 3DS devices, but digital game purchases remain device-specific—you won’t auto-access a game on a second console unless you re-download it.
- Protect your NNID with a strong 12+ character password, secure registered email with 2FA enabled, monitor eShop purchase history monthly, and avoid phishing by only accessing accounts.nintendo.com for recovery.
What Is a Nintendo Network ID and Why You Need One
A Nintendo Network ID is Nintendo’s legacy online identity system for the Wii U and Nintendo 3DS family. It’s essentially your username and password combo that connects you to Nintendo’s services, letting you play online, shop the eShop, add friends, and manage your digital library on those consoles.
Unlike newer Nintendo accounts tied to Switch, an NNID is device-specific and tied directly to your Wii U or 3DS hardware. You’ll need one if you still play titles like Mario Kart 8 on Wii U, Smash Bros for 3DS, or any online-enabled 3DS game that requires network authentication.
Even though Nintendo has moved on to the unified Nintendo Account system for Switch, your NNID remains valid and functional on legacy hardware. Many collectors, speedrunners, and players with unfinished business on older platforms still maintain and use these accounts. If you’re planning to dig into the Wii U or 3DS library, having an active NNID isn’t optional, it’s the gateway to the full experience.
Creating Your Nintendo Network ID: Step-by-Step
Requirements Before You Start
Before you create an NNID, gather these essentials:
- A Wii U console or Nintendo 3DS/3DS XL/2DS device
- An internet connection (Wi-Fi for console, either Wi-Fi or mobile hotspot)
- A valid email address (you’ll use this to verify your account and recover it later)
- Your age (you’ll confirm you’re over 13: under 13 requires parental setup)
- Patience, the whole process takes about 10–15 minutes
If you’re setting up an account for someone under 13, the parent or guardian will need to create a Parental Controls PIN and manage permissions. This adds a couple extra steps but isn’t complicated.
Setting Up on Wii U and 3DS
The setup process differs slightly between Wii U and 3DS, but both are straightforward.
On Wii U:
- From the Wii U home menu, select the user account icon in the top-left corner.
- Choose “Create a new account” or “Create a Nintendo Network ID.”
- Read and accept the terms of service (yes, you have to).
- Enter your desired username (must be 16 characters or fewer, alphanumeric).
- Create a strong password (8+ characters, mix of upper/lowercase and numbers).
- Provide your email address and verify it, Nintendo sends a confirmation link.
- Confirm your date of birth and region.
- Connect to the internet and finalize your account.
On 3DS:
- From the home menu, tap the orange smiley face icon (System Settings).
- Scroll to “Nintendo Network ID Settings” and select it.
- Choose “Create a new ID.”
- Enter the same information as Wii U: username, password, email.
- Confirm your region and date of birth.
- Accept the agreement and create your ID.
Both processes will have you confirm your email address via a link Nintendo sends. Check your spam folder if you don’t see it, Nintendo’s verification emails sometimes hide there.
Linking to Your Nintendo Account
Once you’ve created your NNID on Wii U or 3DS, you can optionally link it to a Nintendo Account, which is useful if you also own a Switch. This bridges your identity across platforms, though it’s not required to use your NNID.
To link them:
- Visit the Nintendo Account website (accounts.nintendo.com).
- Sign in or create a new Nintendo Account.
- Go to “Connections” and select “Nintendo Network ID.”
- Enter your NNID username and password.
- Authorize the link.
Once linked, your Nintendo Account inherits your NNID’s purchase history and friends list (if you choose to migrate them). This is helpful if you’re consolidating your gaming identity, but keep in mind that linking is one-way on the legacy side, your NNID doesn’t gain features from the Nintendo Account, but the account does see your NNID data.
Managing Your Nintendo Network ID Account
Updating Profile Information and Settings
Once your NNID is active, you’ll want to keep your profile polished and personalized. Both Wii U and 3DS let you manage basic profile data directly on the console.
On Wii U:
- Go to the account icon and select your NNID.
- Choose “Account Settings” and then “Profile.”
- You can update your profile picture (upload from your console’s camera or use a pre-set avatar).
- Add a status message or bio (up to 80 characters).
- Adjust privacy settings, decide who can see your profile, send you messages, and add you as a friend.
On 3DS:
- Open System Settings and go to “Nintendo Network ID Settings.”
- Select “Profile.”
- Update your picture, change your display name (different from your username), and set a status.
- Configure privacy for friend requests and profile visibility.
These settings are console-specific, if you have multiple 3DS devices linked to the same NNID, each console maintains separate profile data. Your username stays the same, but your profile picture or status might differ per device. That’s intentional design: it lets different household members use the same NNID with different profiles.
Changing Your Password and Security Options
If it’s been a while since you created your NNID, or you’ve shared it with family members, changing your password is smart. Password resets are handled on the Nintendo website, not the console itself.
- Go to accounts.nintendo.com (or sign in via your NNID at the Wii U/3DS account recovery page).
- Select “Sign In” and enter your NNID username and current password.
- Once logged in, go to “Account Settings.”
- Select “Password” and choose “Change.”
- Enter your old password, then your new one twice.
- Confirm the change.
For extra security, Nintendo supports two-factor authentication on its main account system, though this primarily benefits Nintendo Account users rather than NNID holders. If you’ve linked your NNID to a Nintendo Account, enabling 2FA on the account adds a layer of protection to both identities.
If you’ve forgotten your password, select “Forgot Your Password?” on the sign-in screen. Nintendo will email you a reset link, which is why maintaining an active, monitored email address is crucial. Lost account recovery becomes exponentially harder without access to your registered email.
Linking Multiple Devices
One NNID can be linked to multiple Wii U and 3DS devices, which is handy if you own more than one console or live in a household with shared systems.
Here’s how it works:
- Create the NNID on your first console (as described earlier).
- On a second Wii U or 3DS, during account setup, select “Sign in with an existing Nintendo Network ID” instead of creating a new one.
- Enter your existing NNID username and password.
- The console links to your account, pulling your eShop purchases, friends, and profile data.
Important caveat: While your NNID itself is the same across devices, each console maintains its own local copy of your account and purchase history. If you buy a game on one 3DS and sign in to the same NNID on another 3DS, you won’t automatically have access to that game on the second device, you’ll need to re-download it from the eShop. This differs from how the Switch and Nintendo Account handle digital games (which offer broader re-downloading rights), so plan accordingly.
Nintendo eShop and Digital Purchases
Accessing the eShop with Your NNID
The Nintendo eShop for Wii U and 3DS is a digital storefront hosting thousands of games, from classic NES and SNES titles to recent indie releases. Your NNID is your gateway in.
Opening the eShop:
- On Wii U: Select the eShop icon from the gamepad menu. It’s the orange shopping bag.
- On 3DS: Tap the eShop icon on the home screen (the colorful shopping bag).
The first time you access the eShop, you’ll be prompted to accept terms of service and confirm your region. Once that’s done, you’re free to browse. The eShop is region-locked, so your NNID’s region setting determines which games and prices you see. A US NNID accesses the US eShop in USD: a European NNID sees the EU catalog in EUR. You can’t switch regions after your NNID is created without contacting Nintendo support, so choose carefully at setup.
Browsing the eShop doesn’t require a payment method on file, but purchasing does. Think of it like window shopping, you can wishlist games and watch price drops before committing.
Managing Payment Methods and Purchases
To buy digital games or DLC, you’ll need to add a payment method. Nintendo accepts credit cards, debit cards, and eShop gift cards.
Adding a payment method:
- Open the eShop and tap your account icon (top-right corner).
- Select “Account Settings” > “Payment Method.”
- Choose “Add a Credit/Debit Card” or “Redeem a Card.”
- Enter your card details (Visa, Mastercard, American Express) or a gift card code.
- Confirm and save.
Nintendo stores payment info encrypted and PCI-compliant, so it’s reasonably secure. That said, you can revoke payment method access at any time from your account settings.
Viewing and managing your purchase history:
- Go to the eShop and select your account icon.
- Tap “Account Settings” > “Purchase History.”
- You’ll see a list of every game, DLC, or content you’ve bought with that NNID.
This is useful for tracking what you own, re-downloading games, or disputing fraudulent charges. If you spot a purchase you didn’t make, How-To Geek’s gaming troubleshooting guides cover account recovery steps in detail, but your first move should be contacting Nintendo’s customer support directly, unauthorized charges warrant immediate action.
Troubleshooting purchase issues:
If a purchase doesn’t go through, check your card’s 3D Secure verification settings (some cards require a second password for online purchases). Nintendo’s payment gateway sometimes flags transactions as suspicious, especially if you’re in a different region or country than your card issuer. If this happens, try again in a few moments, or call your bank to confirm they’re not blocking Nintendo transactions.
Online Gaming and Multiplayer Features
Playing Online Games with Your NNID
Your NNID unlocks online multiplayer on compatible Wii U and 3DS games. Titles like Mario Kart 8 (Wii U), Smash Bros (both platforms), Splatoon (Wii U), and Pokemon Sun/Moon (3DS) all require an active NNID to play online.
Before going online, ensure:
- Your console is connected to the internet (check Settings > Internet).
- Your NNID is active and has no bans or restrictions.
- The game cartridge or digital copy is compatible with online play.
- Your router has ports open for gaming traffic (usually ports 80, 443, and some UDP ports, Nintendo’s setup wizard helps with this).
When you launch an online-enabled game, your NNID automatically authenticates you with Nintendo’s servers. There’s no extra login step: it’s seamless. If you’re signed in under a child account (under 13), your Parental Controls PIN may restrict online play depending on how the parent configured it.
Network issues during online play?
If you disconnect mid-game or experience lag:
- Restart your console and router.
- Move closer to your Wi-Fi access point.
- Reduce interference from other Wi-Fi networks or devices.
- Consider a wired connection using a USB-to-Ethernet adapter (available for both consoles).
Wii U and 3DS online infrastructure is now legacy, and Nintendo officially retired online services for some older titles. If you’re trying to play an old game that’s been delisted from online (like the original Mario Kart 8 on Wii U, before Wii U Deluxe released patches extending service), you might not be able to connect. Check Nintendo Life’s database for current online service status for specific games.
Adding Friends and Managing Your Network
Once online, building a friends list enriches your experience. You can see what friends are playing, send messages, and join multiplayer sessions together.
Adding friends on Wii U:
- From the home menu, select the person icon (Friends List).
- Choose “Add a Friend.”
- Enter their username, Wii U friend code (a 12-digit code), or search for them by NNID if their profile is public.
- Send a friend request.
- Once they accept, you’re friends.
Adding friends on 3DS:
- Open the Friends List app from the home menu.
- Tap “Add Friend.”
- Choose “Nearby Friends” (if they’re local), “Friend Code” (exchange 12-digit codes), or “Search” (if they’re online).
- Select the person and send a request.
Friend codes are unique to each console and NNID combo, you can’t use one friend code across devices. If you own multiple 3DS consoles with the same NNID, each one has a different friend code.
Messaging and communication:
Wii U and 3DS both allow NNID holders to send text messages to friends. Messages appear in-game (if the game supports notifications) and in your console’s notifications. Keep messages respectful, Nintendo monitors for violations of its Code of Conduct, and abusive messaging can result in a communications ban (which blocks you from online play and messaging but doesn’t delete your account).
Common Issues and How to Fix Them
Password Reset and Account Recovery
Forgotten your NNID password? Nintendo’s recovery process is straightforward if you remember your email.
Password reset steps:
- Go to accounts.nintendo.com.
- Click “Sign In” and then “Forgot Your Username or Password?”
- Enter the email address associated with your NNID.
- Nintendo sends a password reset link to that email (check spam if it doesn’t appear).
- Click the link and create a new password.
- Sign in with your new password on your console.
If you’ve lost access to your email:
This complicates recovery. If you no longer have access to your registered email and you’re locked out, contact Nintendo Support directly. They can verify your identity through console serial numbers, past payment history, or other account data. Be prepared to provide proof of purchase or console documentation. Recovery without email typically takes a few days and requires customer service intervention.
Two-factor authentication (2FA):
If you’ve linked your NNID to a Nintendo Account, you can enable 2FA on the account. This adds a security layer: whenever you sign in from a new device, you’ll need to enter a code from your phone. It’s optional but recommended if you’ve stored payment methods or care about account security.
Connection and Login Errors
Sometimes your NNID won’t connect, or you’ll get an error code. Here’s how to troubleshoot.
Error Code 105-3200 or similar (network error):
- Check your internet connection. Restart your router and console.
- Move closer to your Wi-Fi access point.
- Try wired connection (USB Ethernet adapter) if Wi-Fi is unstable.
- Check if Nintendo’s servers are down (rare, but happens during maintenance).
Error codes related to authentication (like 150-1202):
- Verify your NNID is active and has no restrictions or bans.
- Double-check your username and password are correct.
- Update your console’s system software (Settings > System Update).
- Clear your console’s cache (Settings > Data Management > Delete Cache).
“Cannot connect to the server” or timeout:
- Your NNID might be banned or suspended. Check Nintendo’s enforcement page (support.nintendo.com) for account status.
- Nintendo’s online infrastructure for Wii U and 3DS is aging, so occasional connectivity hiccups are normal.
- If multiple games fail to connect, the issue is your network, not the NNID.
Stuck on the sign-in screen:
- Power-cycle your console completely (hold the power button for 10 seconds, wait 30 seconds, restart).
- Forget your saved NNID on the console (Settings > User > Delete User) and re-add it.
- Check if your account has restrictions or parental controls preventing login.
Banned Accounts and Violations
Nintendo takes its Code of Conduct seriously. Violations can result in a communications ban, suspension, or permanent account closure.
Common reasons for bans:
- Abusive language or harassment via messages.
- Cheating or hacking (modding online multiplayer).
- Purchasing with stolen payment methods or chargebacks.
- Spamming or repeatedly sending friend requests to users who declined.
- Circumventing parental controls.
Checking your account status:
- Go to support.nintendo.com and sign in with your NNID.
- Select “Enforcement” to see if your account has restrictions.
- If you’re banned, the page displays the reason and duration.
If you’re wrongly banned:
Submit an appeal through Nintendo Support. Be honest and concise: explain what happened, why you believe it’s a mistake, and why you should be reinstated. Appeals aren’t always successful, but Nintendo does review them. Permanent bans on newer accounts (created after 2014) are rare unless it’s a second offense.
If you’re banned for a legitimate violation:
Wait out the suspension period (typically 7 days for first-time communications bans). Don’t create alternate accounts to circumvent the ban, that can escalate to a permanent account closure. Nintendo’s enforcement team is fairly lenient for first-time minor violations, but repeat offenders face permanent consequences.
Transitioning From NNID to Nintendo Account
What Changed and Why
Nintendo retired NNID as its primary authentication system when the Switch launched in 2017, replacing it with the unified Nintendo Account. The shift was necessary because:
- NNID was console-specific and couldn’t span across multiple Nintendo platforms.
- The Nintendo Account allows cross-platform identity (Switch, mobile apps, web services).
- It modernizes Nintendo’s backend infrastructure and security standards.
But, NNID never completely disappeared. Wii U and 3DS continue to use NNID for authentication, and your NNID remains valid indefinitely. Nintendo never forced migration, instead, it offered optional linking between NNID and Nintendo Account.
Key differences:
| Feature | NNID | Nintendo Account |
|---|---|---|
| Primary Platform | Wii U, 3DS | Switch, Mobile, Web |
| Cross-Platform Identity | No | Yes |
| Friends List | Console-specific | Unified across platforms |
| Digital Purchases | Per-console | Linked to account |
| Two-Factor Auth | Not available | Available |
| Online Services | Wii U/3DS only | Switch + Legacy |
Unless you plan to play on Switch or use Nintendo mobile apps, your NNID works fine as-is. There’s no pressure to transition.
Migration Tips for Existing Users
If you want to bridge your NNID to a Nintendo Account (to consolidate your identity or prepare for the future), here’s the smart way to do it.
Before you link:
- Update your NNID’s registered email to one you actively check.
- Make sure your NNID has no bans or restrictions.
- Check your current NNID balance on the eShop (if you have credit).
- Download any digital games you want to keep (they’re tied to your NNID, not your account after linking).
The linking process:
- Go to accounts.nintendo.com.
- Create a new Nintendo Account (or sign in if you already have one).
- Go to “Connections” and select “Add a Nintendo Network ID.”
- Enter your NNID username and password.
- Confirm the link.
Once linked, your Nintendo Account can see your NNID purchase history, but purchases remain isolated. eShop credit stays on your NNID: digital games on your 3DS stay on your 3DS even after linking (they don’t migrate to Switch automatically).
After linking, you can:
- Use your Nintendo Account to sign into Switch or mobile apps.
- See your combined friends list (if you opt into it).
- Access unified settings across platforms.
- Use two-factor authentication on your account.
What doesn’t happen:
- Your NNID doesn’t gain new features or functionality.
- Your 3DS/Wii U games don’t become available on Switch.
- Your eShop balance doesn’t transfer between platforms.
- Your NNID changes or gets replaced, it still works independently on legacy hardware.
Think of linking as creating a bridge between two separate systems, not a full migration. Twinfinite’s comprehensive guides break down account transitions across Nintendo platforms in even greater detail if you need extra clarification.
Staying Safe: Security Best Practices for Your NNID
Your NNID is tied to payment methods and digital purchases, so protecting it matters. Here’s how to keep it secure without paranoia.
Strong password fundamentals:
- Use at least 12 characters mixing uppercase, lowercase, numbers, and symbols.
- Avoid dictionary words, birthdays, or sequential numbers.
- Don’t reuse your NNID password across other gaming accounts or email.
- Change your password annually or immediately if you suspect a breach.
Email security is critical:
Your registered email is the key to account recovery. If someone gains access to your email, they can reset your NNID password. Use a strong, unique password on your email account, and if your email offers two-factor authentication, enable it.
Protect your friend code:
While friend codes can’t directly compromise your account, sharing them on public Discord servers or Reddit exposes you to spam friend requests. Keep friend codes private and only share with people you know.
Payment safety:
- Don’t save your card on consoles you don’t own (friends’ systems, public Wi-Fi).
- Monitor your eShop purchase history monthly for unauthorized charges.
- Use credit cards over debit cards, credit cards offer fraud protection: debit cards pull directly from your bank.
- Set up purchase notifications with your bank if available.
Beware of phishing:
Nintendo will never email you asking for your password directly. If you receive an email claiming to be from Nintendo asking for sensitive info, it’s a phishing attempt. Real account recovery emails always link to accounts.nintendo.com, not fake lookalike domains.
Enable 2FA on linked Nintendo Account:
If you’ve linked your NNID to a Nintendo Account, enable two-factor authentication on the account. This doesn’t directly protect your NNID on Wii U/3DS, but it secures the linked account from unauthorized access.
What if your account is compromised?
- Change your password immediately via accounts.nintendo.com.
- Review your purchase history for unauthorized charges.
- Check your linked email’s security and change its password.
- Contact Nintendo Support if charges are fraudulent, they can issue refunds.
- If you have a linked Nintendo Account, check that too.
Nintendo’s customer support is reasonably responsive to security breaches. They take fraud seriously, especially if it involves minors’ accounts or stolen payment data.
Conclusion
Your Nintendo Network ID remains a vital gateway to Wii U and 3DS gaming, even as Nintendo’s ecosystem has evolved. Whether you’re a collector dusting off old hardware, a speedrunner tackling classic challenges, or a household managing shared consoles, understanding how to create, manage, and protect your NNID ensures you get the most from these platforms.
Setup is painless, grab an email, follow the console prompts, and you’re online in minutes. Management is straightforward: update your password annually, monitor your eShop activity, and keep your registered email secure. When issues arise (and they occasionally do), troubleshooting is usually as simple as restarting your router or clearing your cache.
The shift to Nintendo Account for Switch doesn’t obsolete NNID: it exists alongside it. Linking is optional, and many players never need to. Your NNID works fine standalone on legacy hardware, and if you decide to bridge it to a Nintendo Account later, the process is reversible and painless.
Keep your account secure, respect the Code of Conduct, and you’ll have uninterrupted access to the rich library of Wii U and 3DS games for years to come. Gaming history doesn’t disappear just because new hardware arrives, and your NNID makes sure that matters.